

Connect a channel, create a post with AI and plan it on the calendar — in 30 seconds.
Let Ocoya draft it
Select Create new at the top of the left sidebar, then Post with AI, and describe what you want. On a brand with no posts yet, Planner shows a Create a post with AI button and ready-made ideas — picking an idea fills the prompt in for you.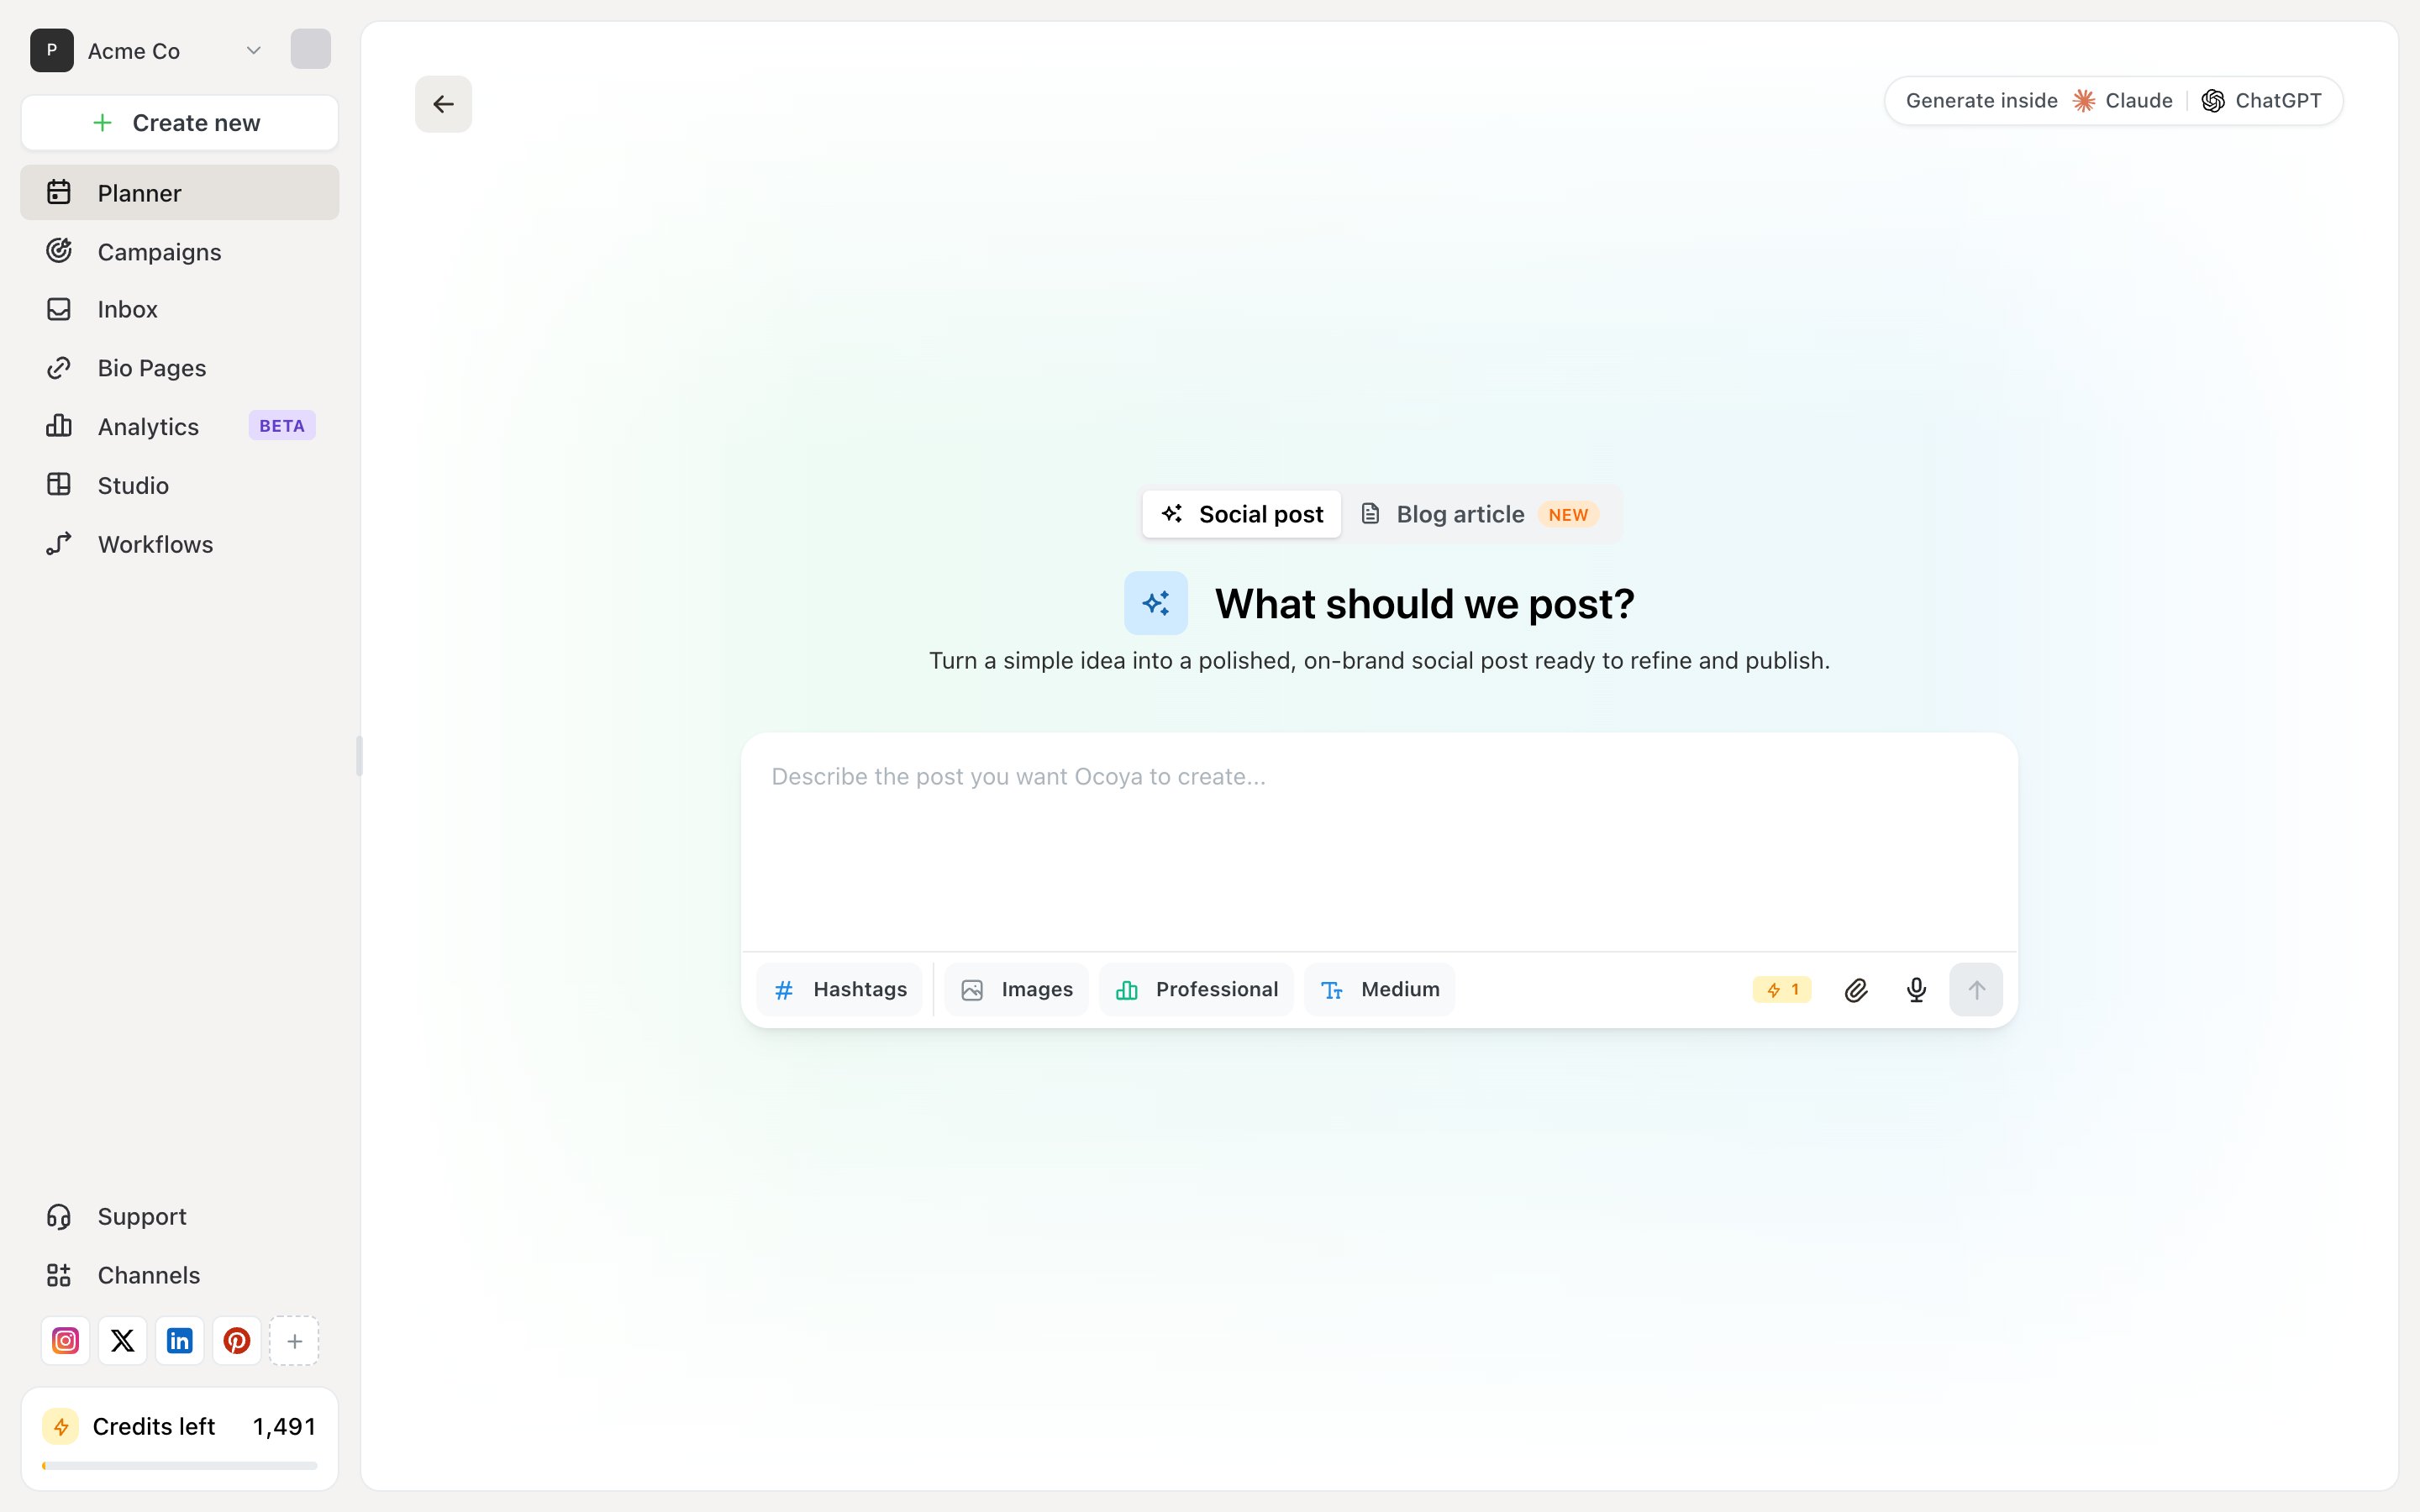
The AI post composer, where you describe the post you want and Ocoya drafts it.
- Hashtags — add generated hashtags
- Images — generate images to go with the caption
- Professional — the tone of voice
- Medium — the length
AI output quality depends heavily on your brand profile. If captions feel generic, fill in your brand description — see Set up your brand.
Write it yourself
1
Open the editor
Select Create new at the top of the left sidebar, then Write a post.
2
Choose your channels
Select which connected channels the post should go to. You can write one caption for all of them, or a different caption per channel — useful when one network has a much shorter limit than another.
3
Write the caption and add media
Ocoya counts characters against each selected channel and warns you before you hit a limit. See Character and media limits.
4
Pick a date and time
Choose when it should publish. The time must be at least two minutes from now — anything closer is refused.
5
Schedule it
Save the post. It appears on your calendar on that date.
See what’s scheduled
Planner has three views of the same posts, switchable at the top:- List — everything in order, with filters for channel, date and status
- Board — posts grouped by status
- Calendar — a month grid

Planner's Calendar view, showing scheduled posts across the month.
Publish now instead
To publish immediately rather than schedule, use Publish now in the post editor. This skips the two-minute minimum.Drafts
Saving a post without a date keeps it as a draft. Drafts never publish — they wait in Planner until you give them a date. Drafts appear in the panel on the left of the Calendar view.Related
Time zones and scheduling
Making sure posts go out at the hour you meant.
Why didn't my post publish?
What to check when a scheduled post doesn’t appear.