

Connect an endpoint
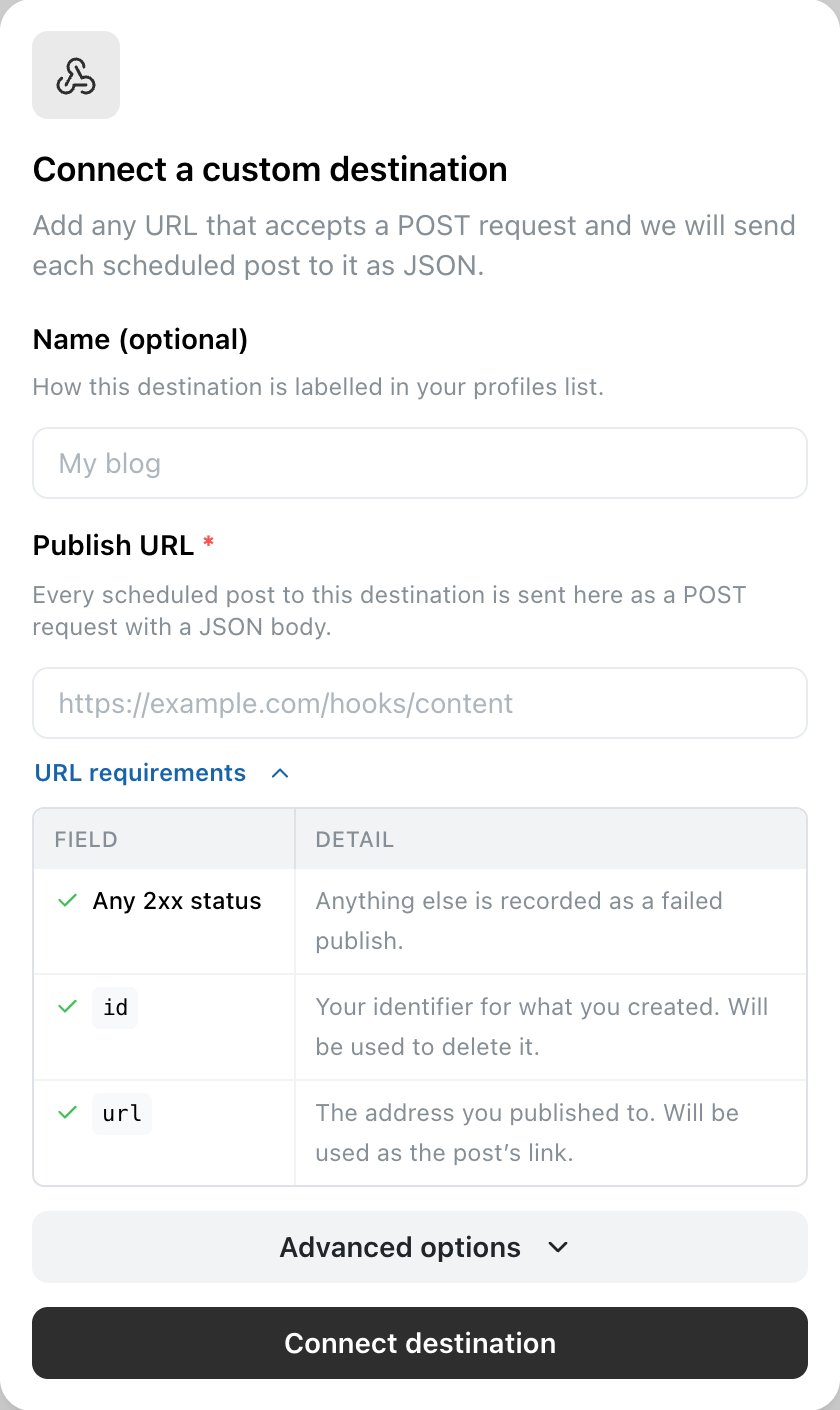
The connect form. The panel beside the fields is the reply contract — a 2xx, and the address to link to.
1
Open Channels
Select Channels in the left sidebar, then Connect channel.
2
Choose Custom
Pick Custom from the Add a connection panel.
3
Name it
Give it a name you’ll recognise in the channel list, like My blog. This is only a label.
4
Enter your publish URL
The full URL, including the scheme —
https://example.com/hooks/content. It has to be reachable from Ocoya’s servers, so an address on your own machine or inside a private network won’t work.If your site redirects — example.com to www.example.com, or http to https — either form works. Ocoya follows the redirect after checking the new address the same way it checked the first.5
Optionally, add a delete URL
Under Advanced options. A second address, used when a post is deleted in Ocoya —
https://example.com/hooks/content/delete. Leave it empty and deleting a post in Ocoya leaves it where it was published.It has to be a different URL from the one above. Your publish endpoint creates something on POST; if the delete went to the same place it would create a second copy on any receiver that doesn’t check the event name.6
Optionally, add headers
Under Advanced options as well. Most endpoints want to know the request is yours before they accept it — add
Authorization with a value of Bearer your-token, or whatever header your receiver checks. Each one is sent with every request — to both URLs.Header values are stored the way credentials are and never sent back to the browser, so the connect form shows an empty Headers section even for a destination that has them. Reconnecting the same URL replaces the whole set — re-enter every header you want to keep.
What your endpoint receives
APOST with Content-Type: application/json. It carries what a blog needs and nothing else:
Inside post.options
Only an article has these — one written by a blog campaign. A post published by hand has none, and options is left out altogether. Treat every field as optional.
An article arrives looking like this:
Need something that isn’t here? Tell us. Fields are added when a receiver needs them rather than sent just in case.
Deleting a post
Deleting a post in Ocoya deletes it on the networks it went to. A custom destination is your system, so Ocoya can only tell it — which it does byPOSTing to the delete URL, if you gave one.
The body is the published post again, with three additions: the event name, the timestamps, and — the only field you need — the id your endpoint returned when it published.
id — the identifier your endpoint returned when it published, given straight back at the top level so nothing has to be parsed out of an address. The url you returned is not sent: an endpoint deleting by its own id has no use for an address it already knows.
With no delete URL configured, nothing is sent. The post is deleted in Ocoya and the channel reports that its copy is still live, rather than quietly doing nothing.
404 or 410 and Ocoya records it as already deleted rather than as a failure. Anything else is reported on the post, and the post is still deleted in Ocoya either way: a destination that refuses is never a reason to keep a post you asked to delete.
What Ocoya expects back
Answer with any 2xx status. Anything else is recorded as a failed publish, and the status and response body are shown on the post so you can see what your endpoint said.Return an id and a url
Your endpoint must answer with both, as JSON:
Both are required. A
2xx without them is recorded as a failed publish, and the message says so on the post — including that the content may already exist at your destination, so republishing blindly would create a second copy.
url is the only key read for the address — permalink was accepted as a synonym in earlier versions and no longer is.
Return both in the same response. Ocoya reads them once, when your endpoint answers; there’s no callback to send them in afterwards, so an endpoint that queues the work has to know its id and its final address before it answers rather than after.
Your endpoint has 30 seconds to respond. Do the slow work after answering rather than before — acknowledge the request, then process it.
A redirect is followed rather than treated as a failure, as long as the address it points at passes the same check the original did — publicly reachable, and pinned to what it resolves to. The method is kept, so your endpoint still receives a POST with the body. Three hops is the limit.
Limits
No vendor sits behind a webhook, so there’s nothing real to validate against — you own the receiving end and decide what it accepts. These are guard rails rather than limits: wide enough for a long article with its media, narrow enough that a runaway generation is caught in the composer rather than at your endpoint.
Common problems
“A destination URL must start with http:// or https://.” The URL has no scheme. Include it. ""Content-Type” is set by Ocoya and cannot be overridden.” A few headers describe the request itself rather than authenticate it — the content headers,Host, Connection, Transfer-Encoding. Ocoya sets those, so your own headers can’t replace them.
""…” is not a valid header name.” A header name is letters, digits and dashes. A space or a colon in the name field usually means the whole Name: value line was pasted into it — the name goes in the left field, the value in the right.
“That is not a valid URL.” The address couldn’t be parsed. Check for typos and stray spaces.
“Your endpoint could not be reached. Check the URL is correct and publicly accessible.” DNS didn’t resolve or the connection was refused. An endpoint on localhost or a private network isn’t reachable from Ocoya.
“Your endpoint answered 200 but did not return id or url.” The request reached your endpoint and it accepted it, but the reply was missing one or both required fields. Ocoya records this as a failed publish because without an id there is nothing to delete by later.
Note the content may already exist at your destination — the endpoint did answer successfully. Check before republishing, or you’ll end up with two copies.
“This destination has no delete endpoint.” A post was deleted in Ocoya and there’s no delete URL on this channel, so nothing was sent and the copy at your destination is still there. Reconnect the destination with a delete URL to change that.
“Your endpoint did not respond in time.” It took longer than 30 seconds. Acknowledge first, process afterwards.
“Your endpoint redirected to https://…” The redirect left the address you gave — a different host or a different scheme that Ocoya couldn’t re-check, or one that resolved somewhere private. Use the address that answers directly. A redirect that stays on a publicly reachable address is followed for you, up to three hops.
“Your endpoint returned 500: …” Your code raised an error. The detail after the status is what your endpoint sent back, truncated.
Related
Character and media limits
Every network’s limits side by side.
The post editor
Writing a different version per channel.